This is a quick and easy guide on how to stake Xion with Keplr wallet.
XION is the first modular Generalized Abstraction layer, purpose-built for consumer adoption by enabling seamless user experiences for everyday users. The Generalized Abstraction layer’s foundation is built upon the seamless integration of complex blockchain functionalities – such as accounts, signatures, fee management, and interoperability directly at the protocol level.
XION eliminates significant barriers to entry for new users while circumventing fragmentation challenges for developers. Its signature-agnostic infrastructure supports a wide array of existing cryptographic curves. It is readily adaptable to future developments, broadening its market reach and assuring long-term viability and interoperability across different blockchain protocols.
Keplr is an open-source web app, mobile application, and browser extension wallet that supports the Cosmos interchain ecosystem.
Step 1 - Set up your wallet for Xion
Ensure you are logged in to your Keplr wallet, this assumes you already have a Keplr wallet account. If you don't have a Keplr wallet account yet, you can download Keplr wallet from keplr.app and then follow this quick and easy tutorial on how to set up your Keplr wallet account.
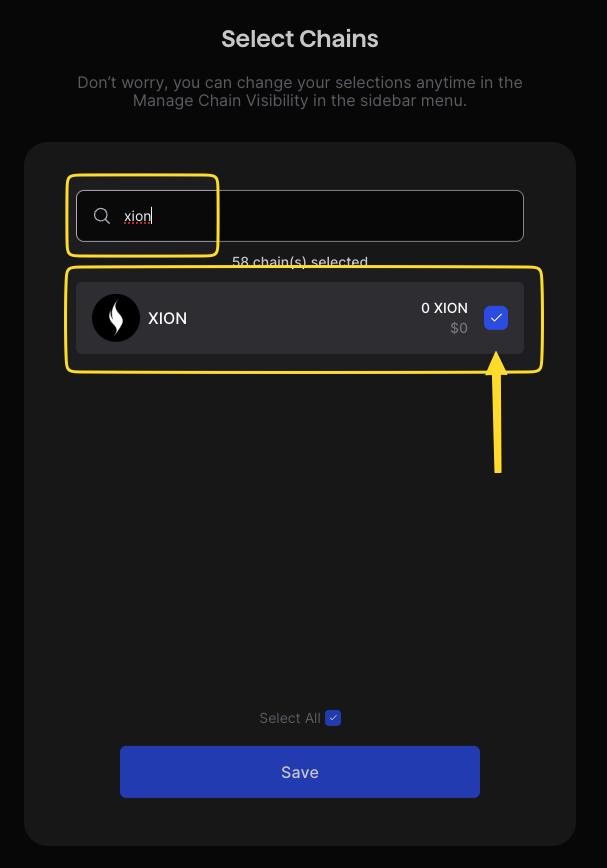
- Open the Keplr wallet extension and go to "Manage Chain Visibility".
- Search for XION, tick the box, and click "Save".
Step 2 - Fund your wallet
Before you stake Xion tokens, you first need to top up your Keplr wallet with $XION. If you already have tokens, proceed to the next step.
- You can purchase $XION on any CEX such as Bybit, Bitget, Gate, etc, or a DEX such as Osmosis.
- Next, deposit your $XION to your Keplr wallet by selecting “XION” on the left menu under assets or use this direct link https://wallet.keplr.app/chains/xion?modal=deposit&chain=xion-mainnet-1 as you withdraw it from an exchange.
Step 3 - Stake your XION
You are now ready to stake your $XION tokens.
- Go to: https://wallet.keplr.app/
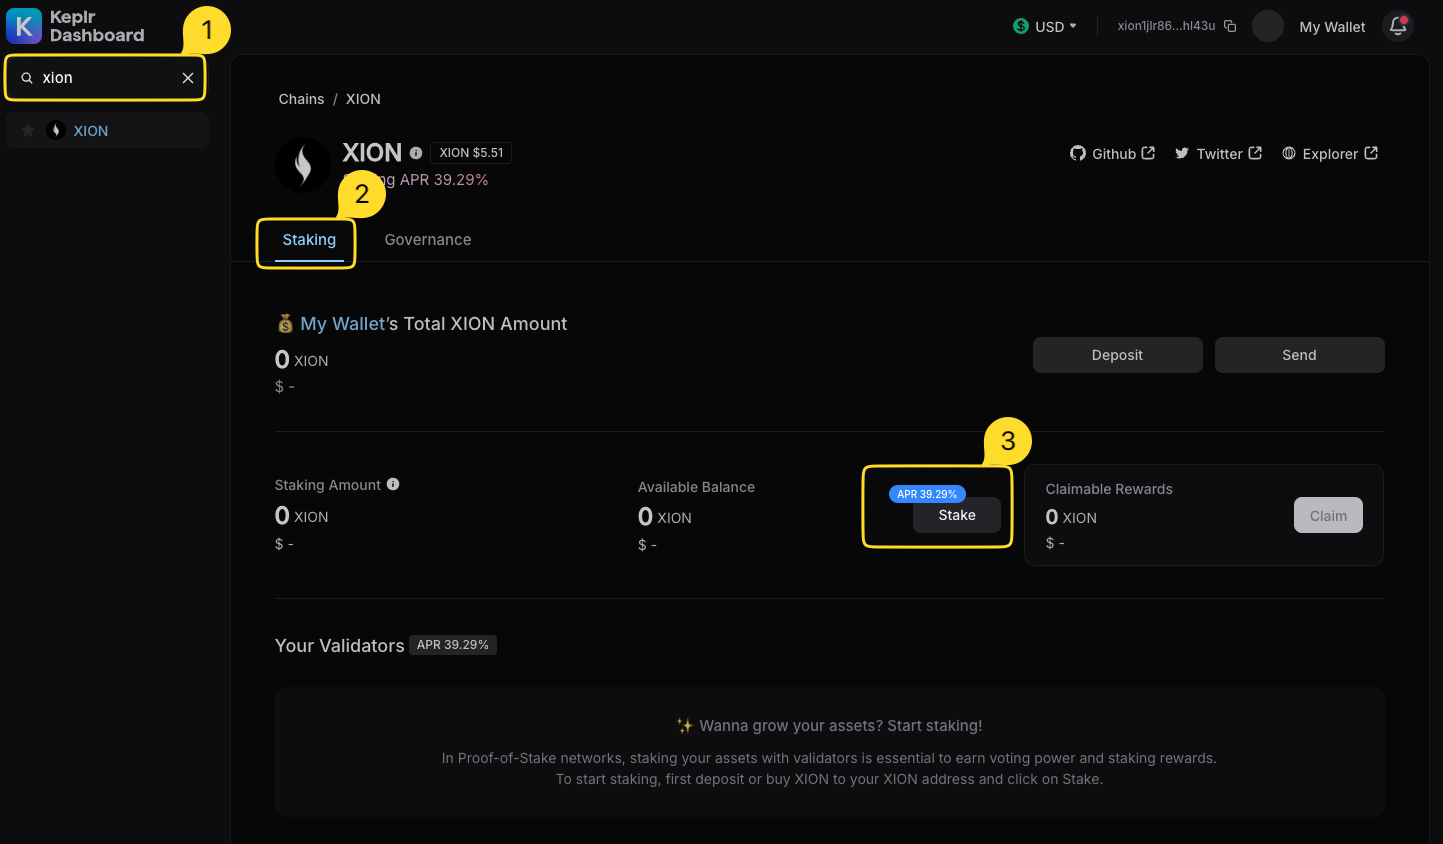
- Next, select the Xion staking tab, by typing “Xion” in the Search Chains textbox on the upper left corner.
- Click "Stake".
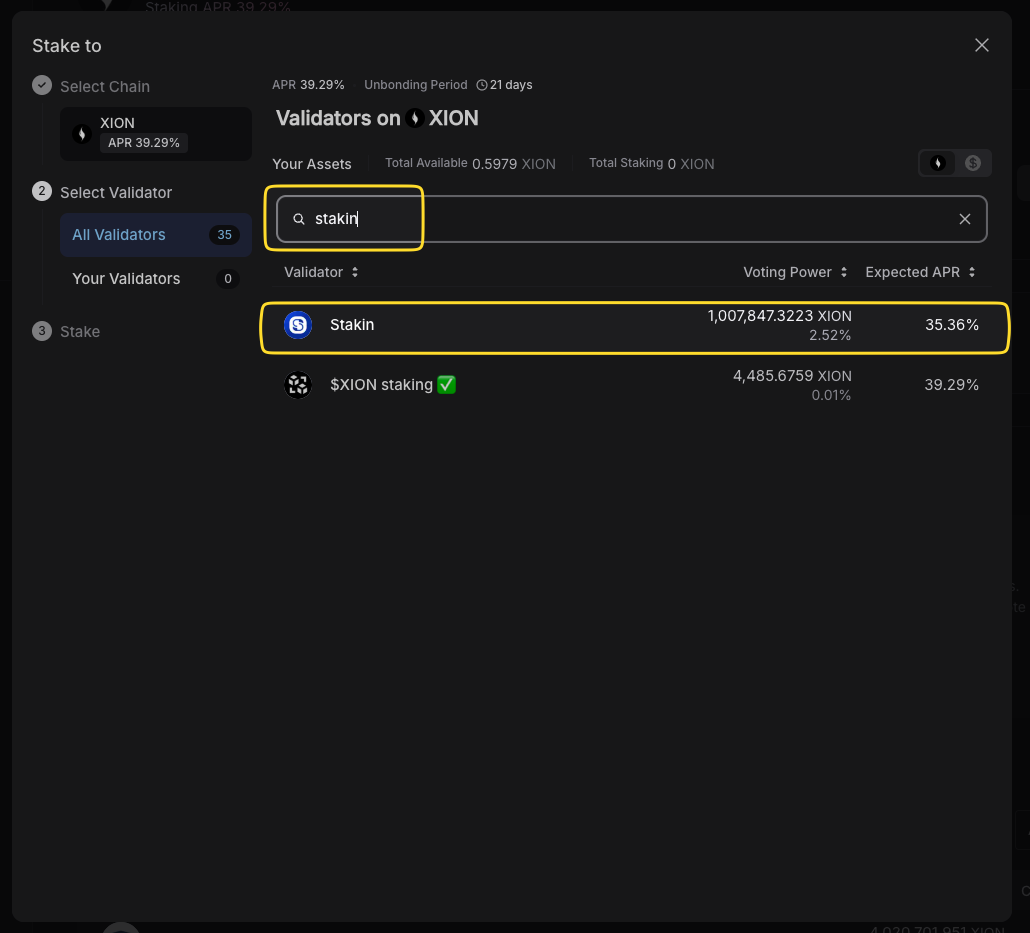
- To proceed, select Stakin from the list of validators by typing in “Stakin'' in the Search validator search box.
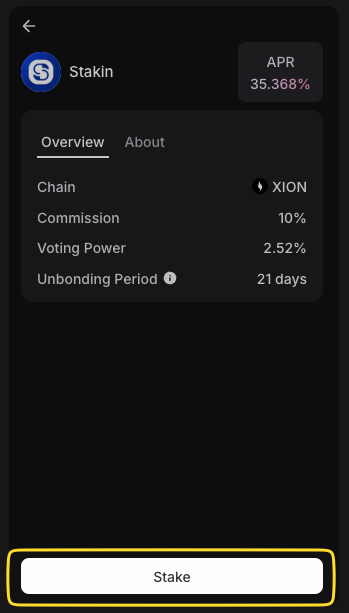
- Review the details, such as Commission, current Voting Power, and Unbonding Period. To proceed, click "Stake"
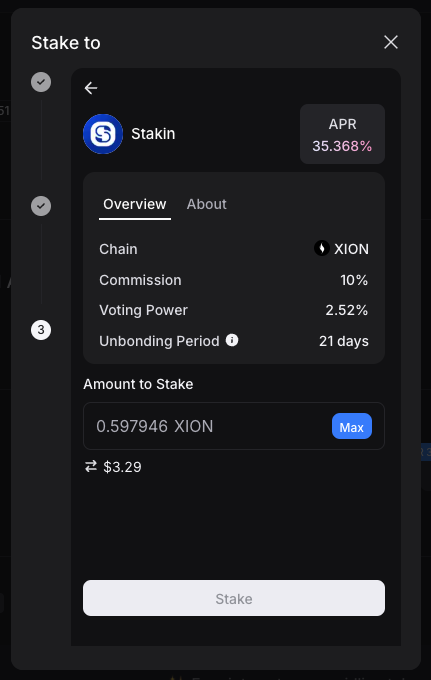
- On the newly opened popup, click “Stake”. Next, fill out the number of $XION that you’d like to stake and click “Stake” once again.
A new popup will prompt you to sign the staking transaction on-chain. Check the transaction details and select “Approve”.

Congratulations! You have now staked your $XION tokens with Stakin. From here you can also Unstake your tokens or Switch Validator when needed.
Staking rewards on Xion need to be manually claimed and restaked. However, this can easily be automated with https://restake.app/. Stakin has also enabled auto-compounding for Xion, which helps you to automatically claim and restake your staking rewards to help you maximise yield. Check out this guide for further instructions https://stakin.com/blog/the-ultimate-restake-auto-compounding-guide.
DISCLAIMER: This is not financial advice. Staking, delegation, and cryptocurrencies involve a high degree of risk, and there is always the possibility of loss, including the failure of all staked digital assets. Additionally, delegators are at risk of slashing in case of security or liveness faults on some protocols. We advise you to do your due diligence before choosing a validator.

