→ To get started with staking your $ARCH, navigate to: https://connect.archway.io/
Select “Connect Wallet” on the top-right corner of the dashboard (see image below). A pop-up will appear asking you to choose the wallet of your choice; this can either be Keplr, Leap, or Cosmostation. For this guide, we used the Keplr wallet. However, the process is the same for all wallets.
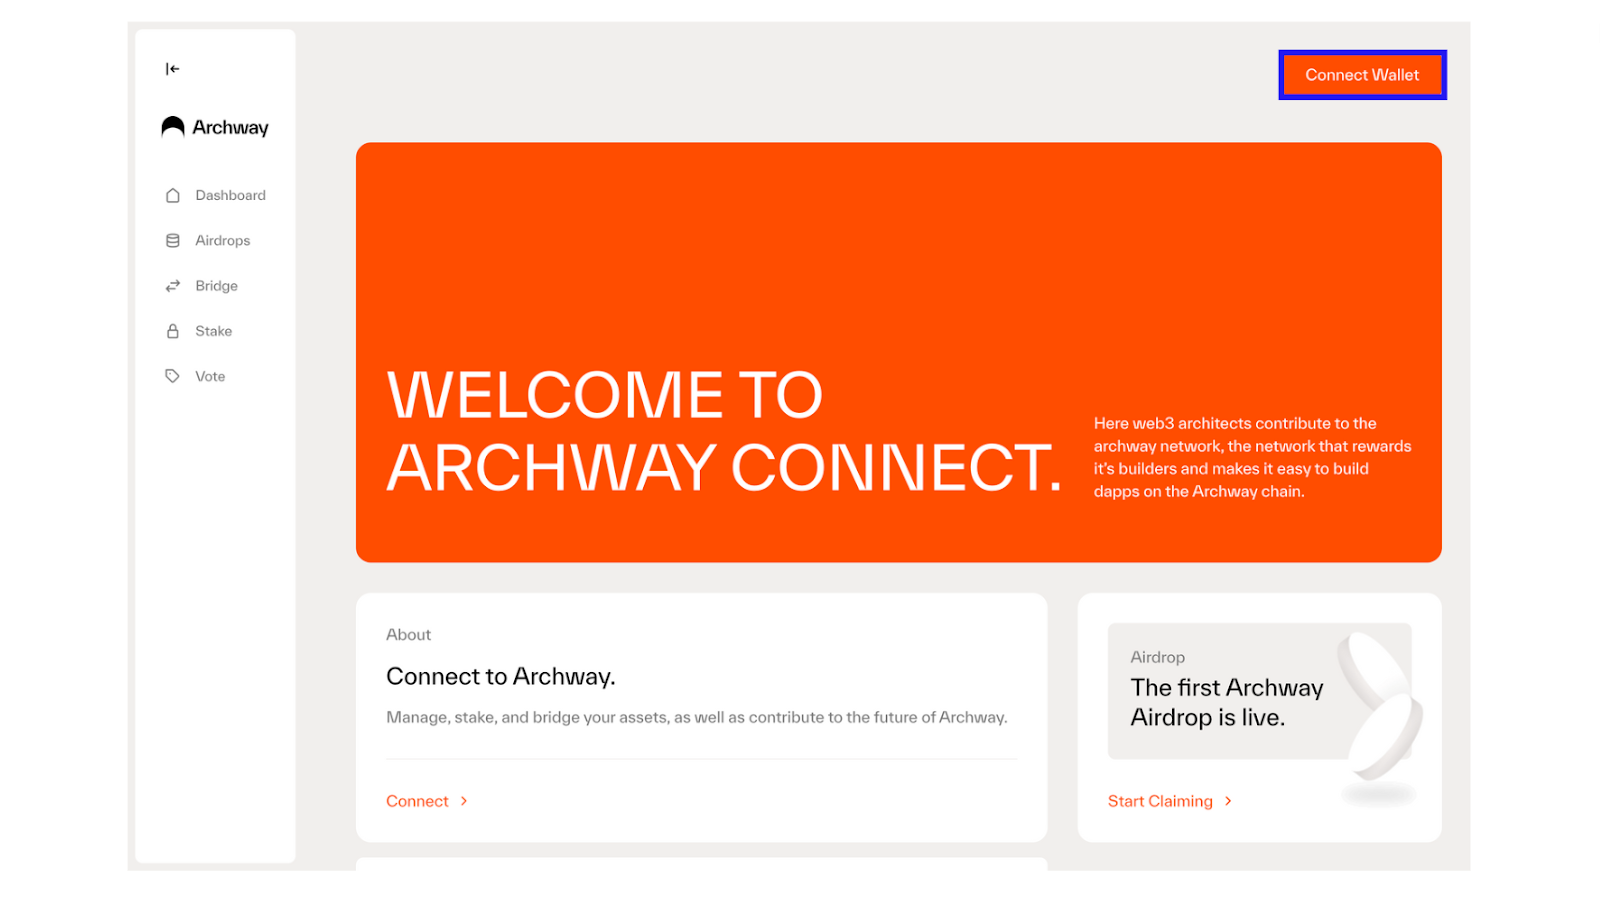
Once connected, navigate to the “Stake” tab on the left side of your screen.
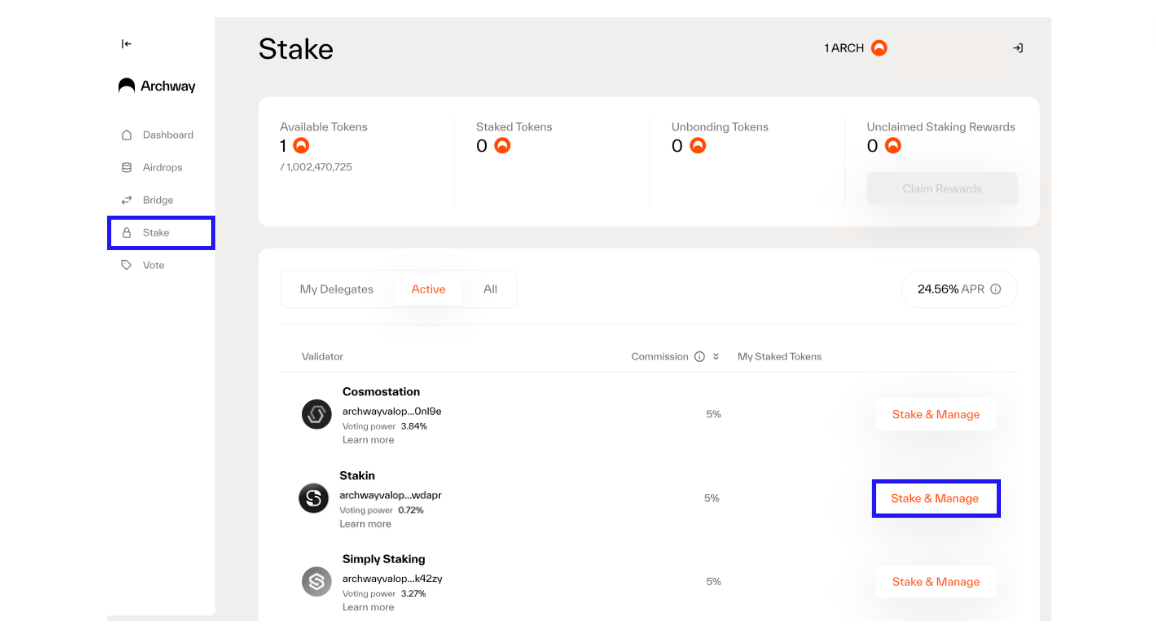
On the stake dashboard, you will be shown the available tokens (the amount you own and the total available amount), current staked tokens, unbonding tokens, and unclaimed staking rewards.
Unstaking or unbonding $ARCH takes 21 days. During this time, you’re not able to access your digital assets. If you want to earn extra rewards on your staked assets, you can claim and restake your earned rewards.
To stake, select the validator of your choice by scrolling through, and on the right side, click on “Stake & Manage”.
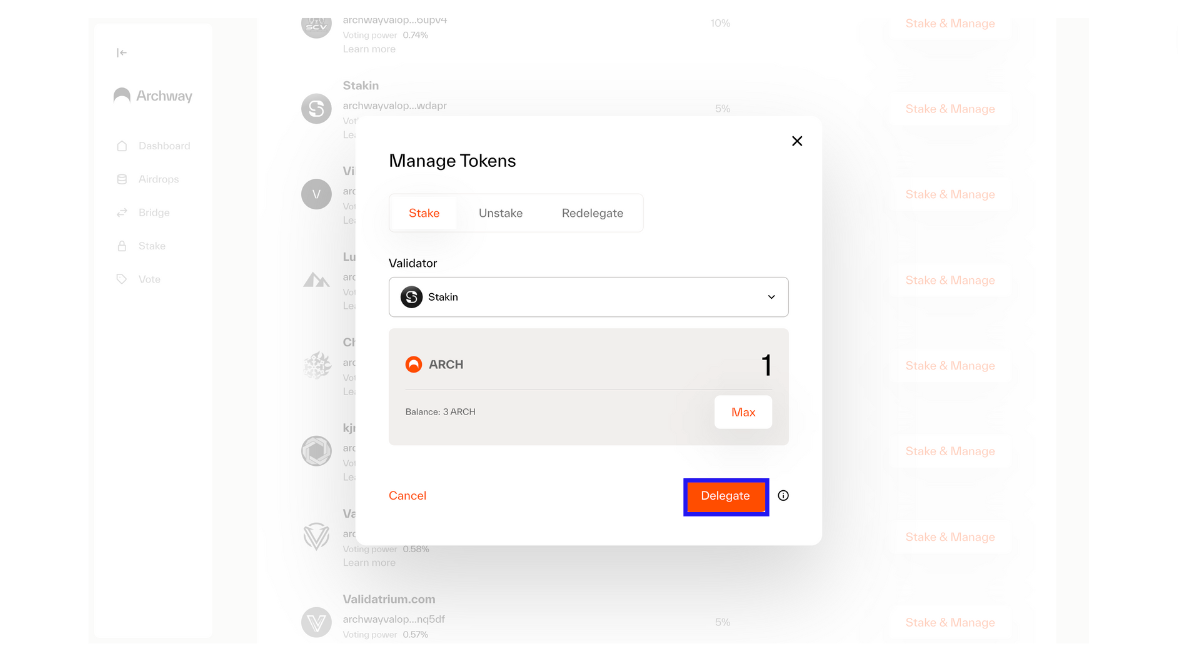
Once selected, confirm the number of $ARCH that you’d like to stake with the validator. Remember that you’ll need to save some $ARCH for future fees. Next, select “Delegate”.
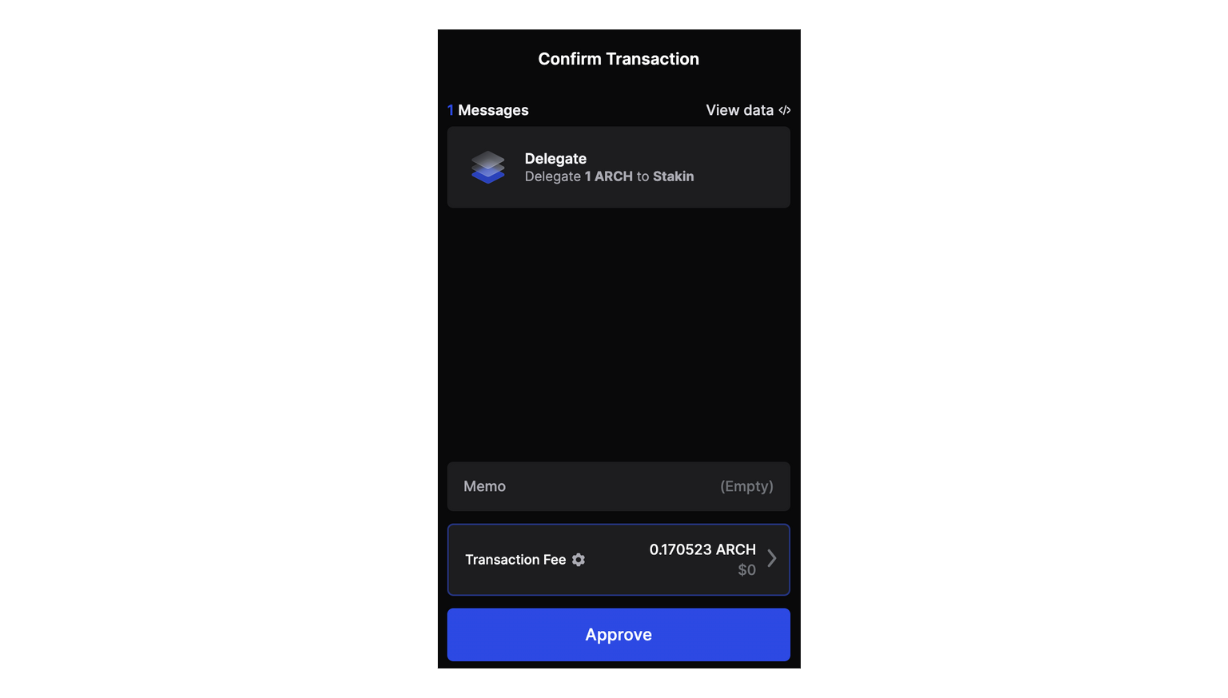
The Keplr wallet extension will open to request you to confirm your transaction. If everything is correct, select “Approve”. It might take a few seconds to get a confirmation.
That’s it! You’re now earning $ARCH staking rewards! Congratulations!
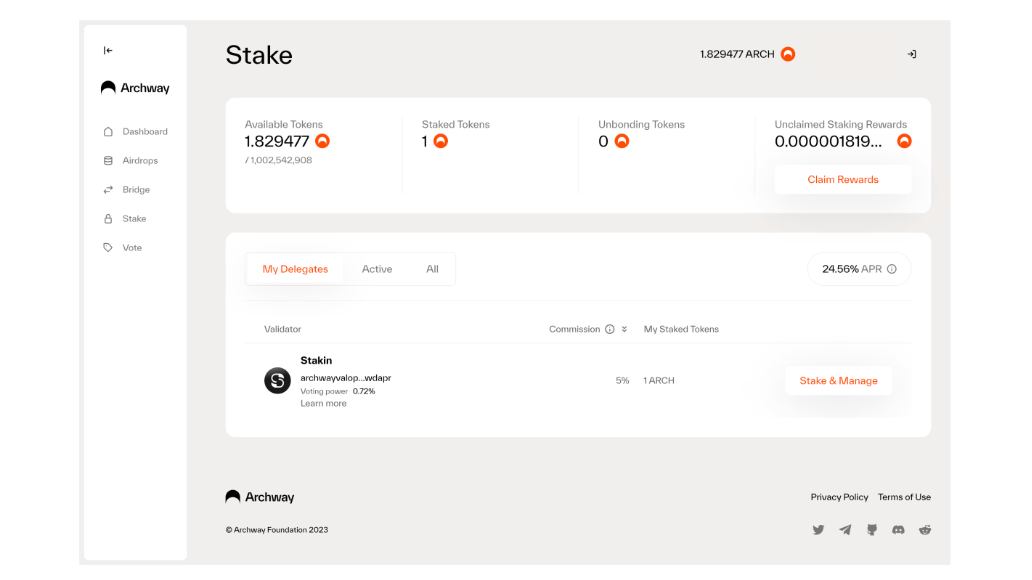
Claiming $ARCH Staking Rewards
Once you’ve staked and started earning rewards, you can claim those rewards to either participate in other activities in the Archway ecosystem with them, restake, or simply HODL.
To claim, revisit the “Stake” tab on the Archway Connect dashboard. You’ll find the “Claim Rewards” section on the right side of the dashboard. Click on it.
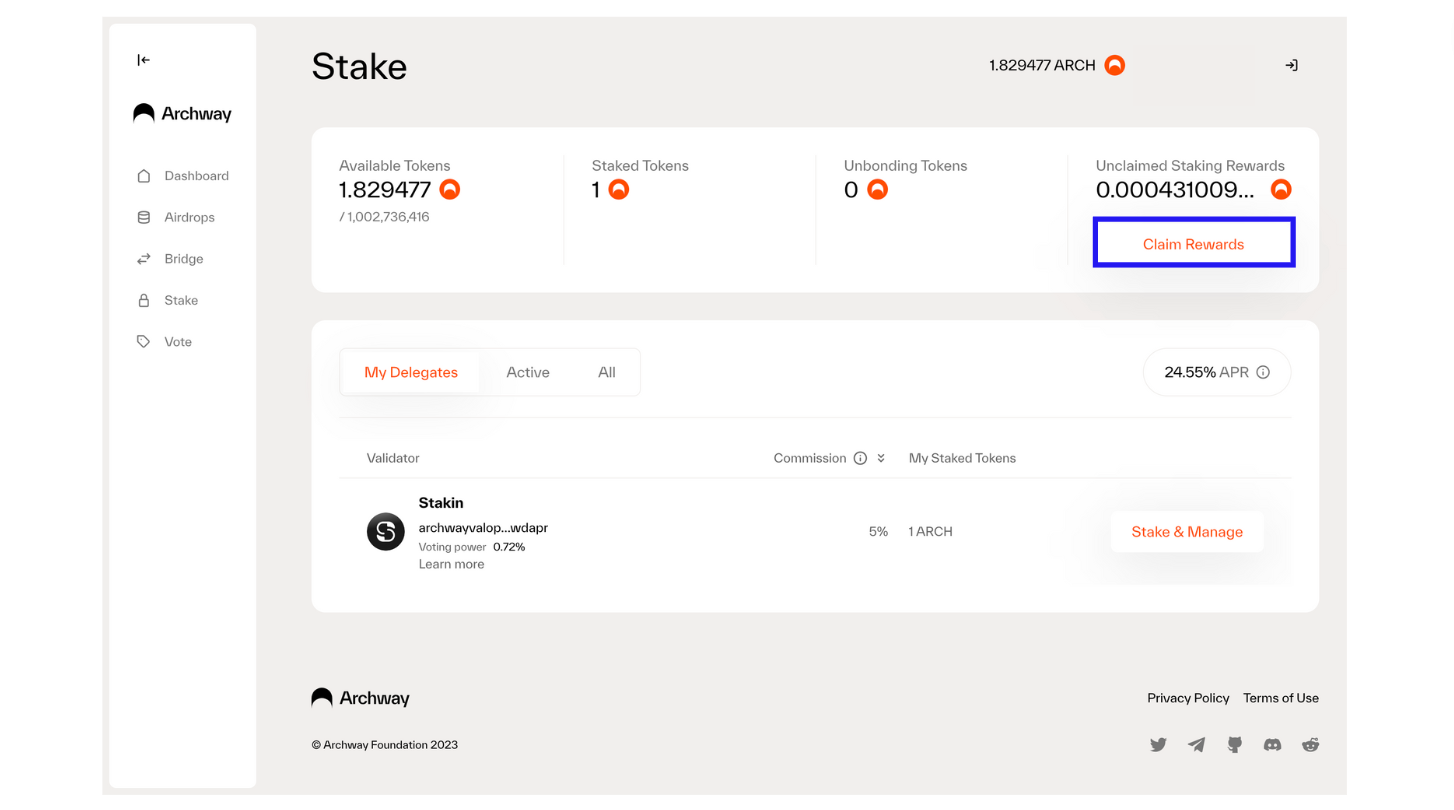
Next, approve the transaction in your Keplr wallet by selecting “Approve”.
Unbonding and Restaking $ARCH
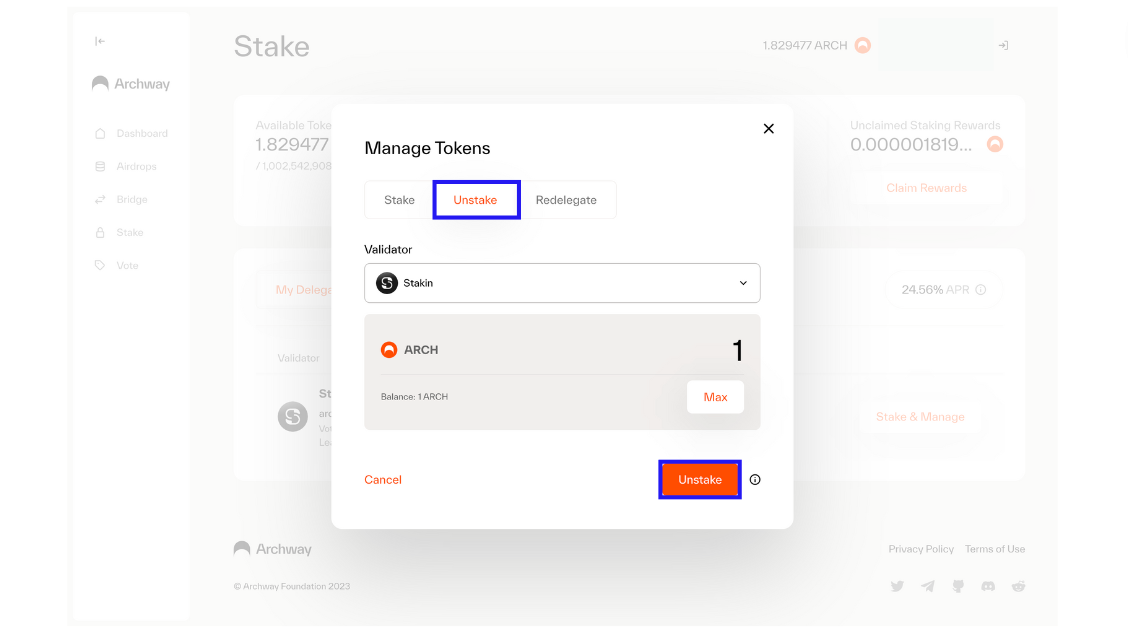
If you’re in the “Stake” section on the dashboard, you can select the validator you’d like to undelegate from by clicking on the validator and then selecting “Unstake”. You can then confirm and approve the transaction in your wallet.
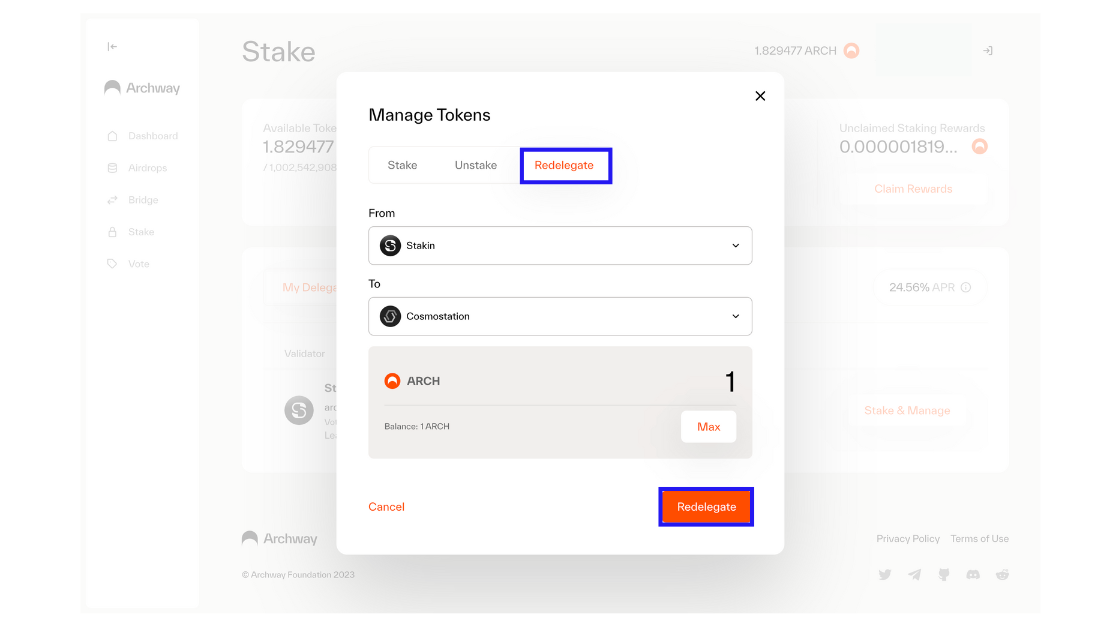
To restake. Select the validator that you’re currently staking with. Then in the pop-up, select “Redelegate”. You can now choose from and to which validator you’d like to redelegate. Add the amount you’d like to redelegate and select “redelegate”. Confirm the transaction in your wallet, and that’s all. You’ve now restaked your $ARCH.
How To Track Your Staked $ARCH
You can track your staked Archway assets via the Archway Explorer or Mintscan. There is also an even easier way to track your $ARCH, which is via Stakin’s non-custodial dashboard: https://dashboard.stakin.com/. It’s free and only requires creating an account and adding your public wallet address. Depending on the network, You can track your staking activity and even generate and download staking reports as CSV files. Feel free to reach out if you need any customizations or API access!
Final Thoughts
Archway is a Delegated Proof-of-Stake (DPoS) blockchain created with the Cosmos SDK, relying on validator nodes to secure the network. By participating in staking through delegating your assets with a validator, you help to secure the network, can participate in governance voting, and earn extra $ARCH as a reward. So, it’s a win-win situation. We encourage you to consider delegating to multiple validators on Archway and other blockchains to improve decentralization. If you have questions about staking $ARCH, visit https://stakin.com/stake/archway or message us through Telegram or Discord.
DISCLAIMER: This is not financial advice. Staking, delegation, and cryptocurrencies involve a high degree of risk, and there is always the possibility of loss, including the failure of all staked digital assets. Additionally, delegators are at risk of slashing in case of security or liveness faults on some protocols. We advise you to do your due diligence before choosing a validator.


