Hi Readers,
Although it isn’t a recent network, Kusama, Polkadot’s canary network, has recently gained more attention due to its growing community and position as Polkadot’s first para relay chain. While all eyes are on Polkadot as the “Next Ethereum”, Kusama allows more rapid development of parachains, countless tests can be done, and governance is a lot faster. And with both networks here to stay, we figured it was time for a full staking guide for $KSM with Ledger.
If you’re interested in staking Kusama without a hardware wallet, visit our full guide here. For those of you unfamiliar with Kusama, read our full introduction article.
Kusama $KSM Staking Guide
First things first, these are the things you’ll need before you can get started with staking your $KSM: your Ledger Nano or X, make sure to have the latest version of Ledger Live for the best experience, and finally, assure that you have a web browser available that can open Polkadot-JS Apps.
Step 1 — Installing Kusama On Your Ledger Application
Open the Ledger Live App on your computer and select the “manager” tab on the left-side menu. Connect your Ledger device with your computer, and select “YES” on the device to allow the App access.
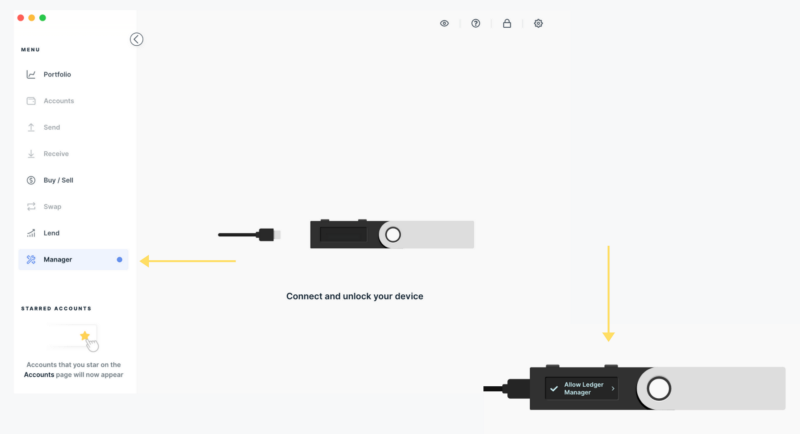
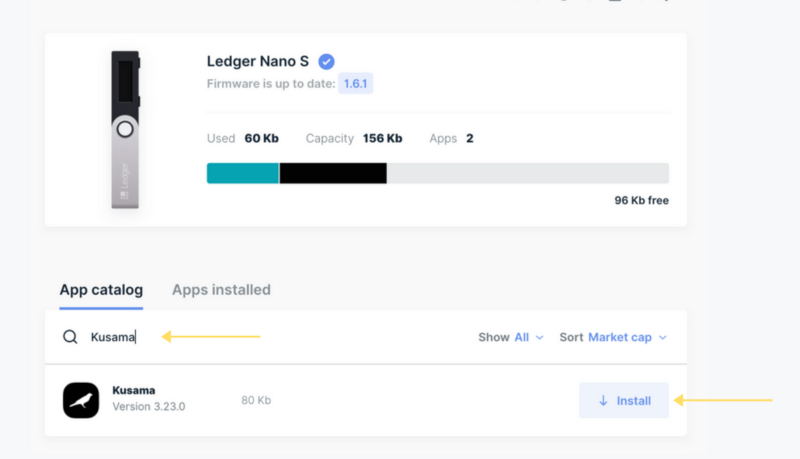
Once you’ve connected your Ledger, an overview of all the device’s assets and apps will be shown. For the next step, go to the app catalog and fill in “Kusama” to quickly find the app. Select “Install” on the right side of the screen.
Step 2 — Connecting To Polkadot-JS
Once you’ve downloaded the Kusama app onto your Ledger, go to https://polkadot.js.org/apps/. When you open the dashboard, a pop-up will ask you to allow the Polkadot-JS app access to your computer. Select: “Yes, allow the application access” to continue.
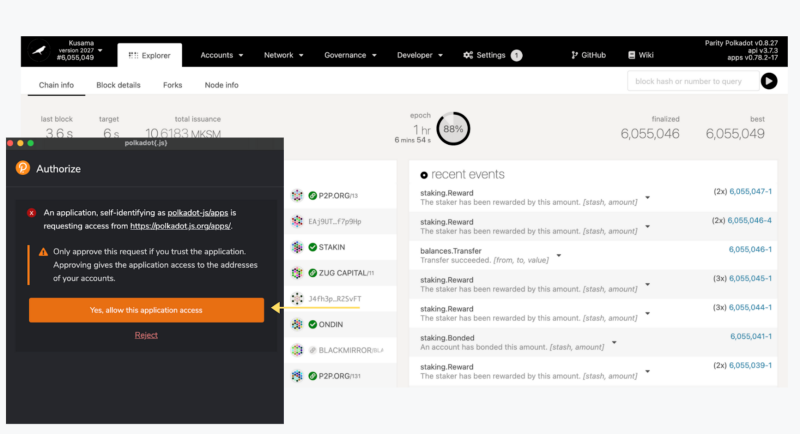
To use Ledger with https://polkadot.js.org/apps/, you will need to be on a Chromium browser (Google Chrome, Edge).
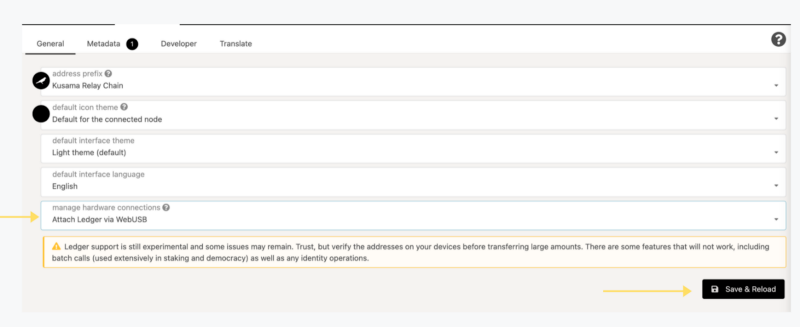
First, you’ll want to turn on the Ledger connectivity, select “settings” on the Polkadot-JS dashboard. Next, select “General”. In the drop-down menu on the bottom, select “Attach Ledger Via WebUSB” (see image below). Once selected press “Save & Reload” on the bottom right of the page.
Once reloaded, on the top menu, select “accounts” and then “accounts” once again in the drop-down menu.

For the next step, make sure your Ledger device is still connected and unlocked. In the accounts’ dashboard, select “Add via Ledger”.

A pop-up will appear asking you for your account name, type, and index.
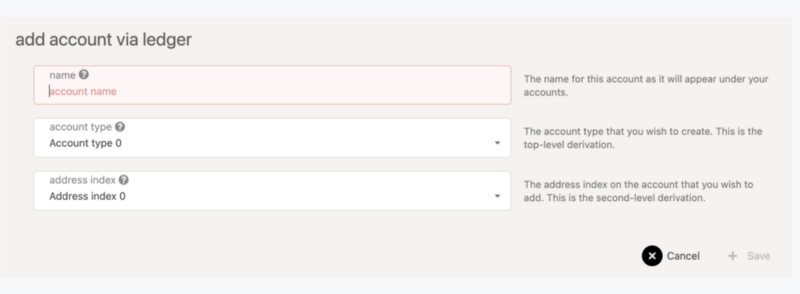
The account name lets you select a Ledger account. It is possible to have multiple accounts on one Ledger device. The second drop-down lets you pick a derivation path; if you’re unsure which one to select, we recommend choosing the first default option in the menu.
If you confirm your selection by pressing “+ Save”, you might be asked to confirm the USB connection through a pop-up (this depends on your browser and security settings).
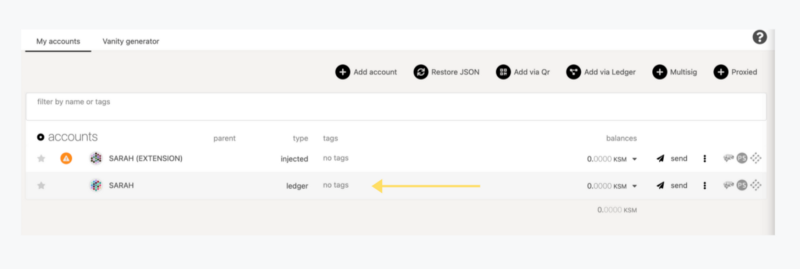
If successful, you should be able to see the ledger account under the “accounts” tab. It will also show you the balance of your account.
Step 3 — Time To Stake!
Side note: because Ledger doesn’t allow batch transactions, you will have to do two transactions if you want to stake your $KSM using a Ledger device.
On the Polkadot-JS dashboard, select “Network” and then “Staking” in the drop-down menu (see image below).
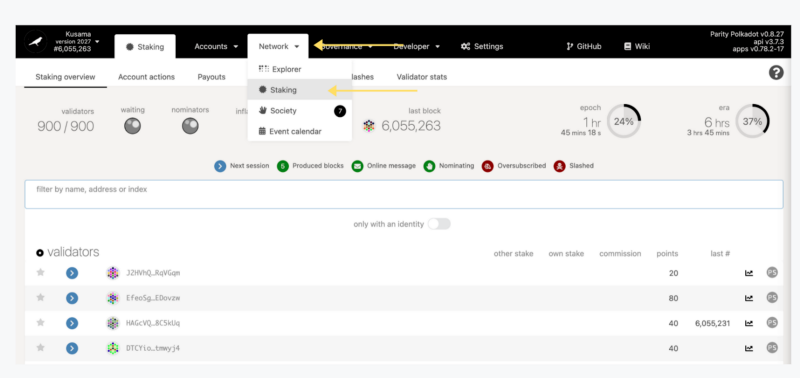
Next, select “Account Actions” on the navigation dashboard. Select: “+ Stash” instead of the nominator or validator button and fill out the number of assets to bond, then confirm the transaction. And confirm the transaction once again on the Ledger device.
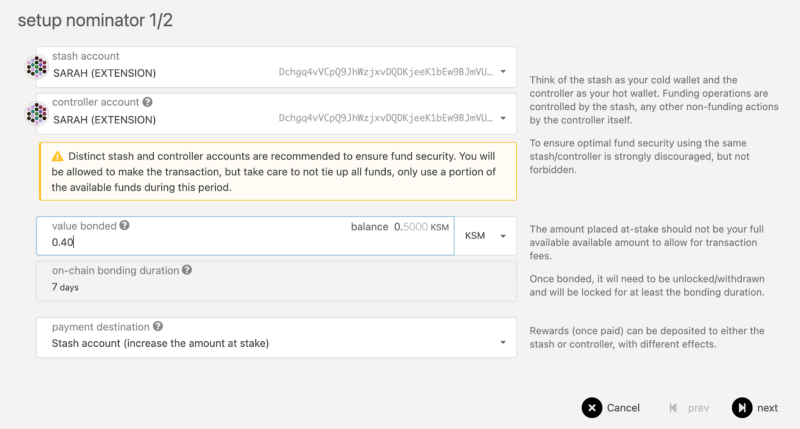
Once the transaction is included, you will see the bonded account on the “Account Actions” page. Then select “+ nominate” to stake your assets and confirm the transaction on your Ledger device once again.
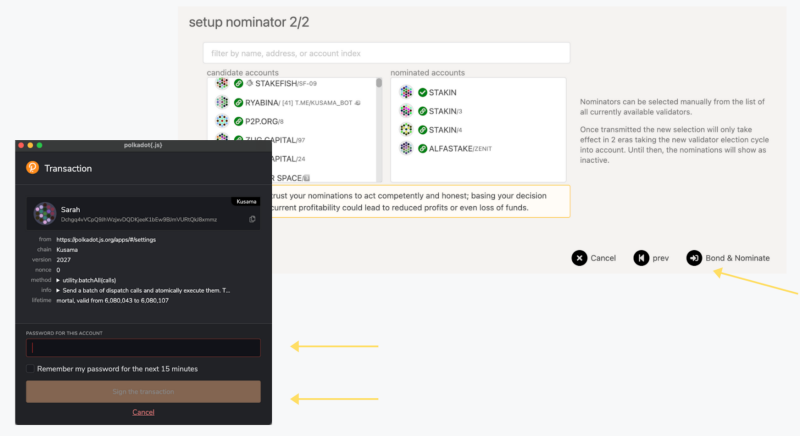
Congratulations! You’ve now staked your $KSM🎉!
DISCLAIMER: This is not financial advice. Staking and cryptocurrencies investment involves a high degree of risk, and there is always the possibility of loss, including the loss of all staked digital assets. Additionally, delegators are at risk of slashing in security or liveness faults on some PoS protocols. We advise you to DYOR before choosing a validator.

